
Today begins the 2 weeks of the progressive Happy Dance that is the count down to the American Embroidery Confernce 2010! To help celebrate the event here at Fresh thread we are going to be having give aways and prizes for everyone ( so don't be sad if you were not able to go this year!.. you can still be part of the fun!)
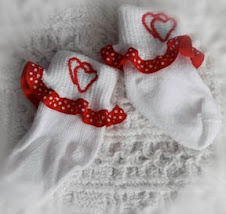
In celebration of the confernce you will be able to download one of my newest designs that I have used in making this adorable in the hoop lapel pin. It's just palm sized... like a nice sized beach pebble, bringing to mind the warm days coming our way. Later today the free file and tutorial will be posted up here for you to download.
During the days of the conference I will be haunting around looking for those who are wearing their Fresh Thread embroidered pebble and when I catch you I will be giving away free design coupons and radical discount codes. By the end of the confernence I will be giving away over 20 design packs, some Lovies and bunches of discount codes good enough to make you squeal in delight!
So check back late this afternoon to get in on the fun!
Hello and welcome back! I am very excited to say that the file is ready and I have a little online tutorial here for you so you can make this up quick as a wink!
First off you can find the file here it's in PES format so should be useable or convertable for everyone.

The first step is to hoop up a piece of stabilizer and then lay down a thin piece of batting and the front fabric for your pin. Use a bit of spray embroidery adhesive to keep it all in place.

Next run the design in colors of your choice.. making sure to match the outline to your fabic color. Then before the last color change...

Lay down a swanky piece of fabric for the back of the pin... do make sure to lay it face down! and then run the last step in a color that blends well.

Next cut out the pin with pinking shears making sure to get close to the stitching line but not cut it! Then cut open a slit on the back fabric ( I have marked with with the blue line.. see above).. Use this slit to turn the pebble right side out and then give it a good pressing!

Next.. cut an oval patch the cover the slit and glue it in place. Or as an alternative whip stitch the opening closed... this will be covered by the pin in many cases so is all very tidy when finshed.

Now it's time to add your pin back. This one is really to small for the pin... I like to use one that is about 3/4 the length of the pin for better support.. but sometimes you take what you an get and this was the size left in my craft stash!

As my kids say " easy peasy, mac and cheesey"!
This design along with 3 others will also be available in my new collection that I hope to have ready for the AEC so keep your eye's peeled for that. The collection will come with printable display cards that make this a real winner for craft fairs and gift giving. Special cards will be included for giving to teachers and other special people you would like to thank as we come close to the end of the school year!


4 comments:
Adorable pin! see you in Atlanta!! Thank you.
Cute pin!
I am so bummed. I was supposed to be there with you in Atlanta :(
Hi, I'm a newbie and getting ready for Atlanta really is exciting. i've finished my quilt, ready to stitch out your cute pin. Mine will be the blue bird (of happiness) and can't wait to meet everyone.
Jean Dewey
Jean... can't wait to meet you!.. I am busy busy with conference doings but time is growing short! :)
maddie
Post a Comment